Intro
With the fastest era of the tech industry, I think every software engineer has to catch up with this knowledge. Thats why I kicked off my project to learn K8s. The first stack I chose was K0s, recommended by my ex-leader, who’s super clever and talented.
- Please keep in mind, this isn’t a guidebook — it’s my diary, so don’t expect too much.
No more rambling, lets dive in!
Preparation
I didn’t wanna run it on my local machine, so I decided to install it on my VPS. It’s finally time to use it after letting it collect dust for ages
Make sure those port are accessible. If you have a firewall enabled, you’ll need to allow these ports
# Control plane
sudo ufw allow 6443/tcp    # Kubernetes API server
sudo ufw allow 8132/tcp    # k0s admin API

# Node communication
sudo ufw allow 10250/tcp   # kubelet API
sudo ufw allow 10256/tcp   # kube-proxy
sudo ufw allow 2379:2380/tcp  # etcd client/peer
sudo ufw allow 179/tcp     # BGP (Calico/MetalLB)
sudo ufw allow 30000:32767/tcp # NodePort range

# Ingress / HTTP(S)
sudo ufw allow 80/tcp
sudo ufw allow 443/tcp

# DNS lookup outbound
sudo ufw allow out 53/tcp
sudo ufw allow out 53/udp
Seek the flame 🔥
K0s
Kick your as* into reading the K0s docs first before taking any next steps.
- Download latest k0s
curl --proto '=https' --tlsv1.2 -sSf https://get.k0s.sh | sudo sh

sudo curl -sSLf https://get.k0s.sh | sudo sh
- Install controller plane
sudo k0s install controller --enable-worker --no-taints
--no-tainsremoves the default taint from the control plane, allowing the scheduler to place regular Pods on this node.
- Start k0s
sudo k0s start
However, if you want to access the cluster from somewhere else (or use an independent install of kubectl), you’ll need the
KUBECONFIGfile. When you create the server, k0s automatically generates aKUBECONFIGfile for you, so just copy it to your working directory and point to it.
- Configure
KUBECONFIG
sudo cp /var/lib/k0s/pki/admin.conf ./admin.conf
export KUBECONFIG=./admin.conf
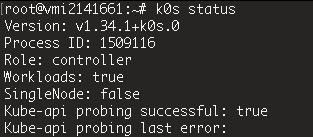 Ok! Looks cool now!
Configure kube-proxy for MetalLB compatibility
k0s doesn’t come with a built-in load balancer, so I have to set up a real one myself. I decided to go with MetalLB
Enable IPVS mode and strictARP
export EDITOR=nano
kubectl edit configmap -n kube-system kube-proxy
Change content to:
apiVersion: v1
data:
    config.conf: |-
        kind: KubeProxyConfiguration
        mode: "ipvs"
        ipvs: {...,"strictARP":true}
Restart kube-proxy pods:
kubectl delete pod -n kube-system -l k8s-app=kube-proxy
Make sure all Pods in the kube-system namespace are running
kubectl get pod -n kube-system

Install MetalLB
Go apply metallb manifest
kubectl apply -f https://raw.githubusercontent.com/metallb/metallb/v0.15.2/config/manifests/metallb-native.yaml

kubectl get pods -n metallb-system

- If
MetalLBfails to create the memberlist secret automatically, create it manually
kubectl create secret generic -n metallb-system memberlist --from-literal=secretkey="$(openssl rand -base64 128)"
- If you accidentally applied
MetalLBbefore setting upkube-proxy, do a rollout restart:
# Check which resources exist
kubectl get deployments,daemonsets -n metallb-system

# If there’s a Deployment
kubectl rollout restart deployment/controller -n metallb-system

# If there’s a DaemonSet
kubectl rollout restart daemonset/speaker -n metallb-system
Configure IP Address Pool
Create a configuration file for MetalLB: metallb-config.yaml
apiVersion: metallb.io/v1beta1
kind: IPAddressPool
metadata:
  name: first-pool
  namespace: metallb-system
spec:
  addresses:
  - YOUR_VPS_PUBLIC_IP/32 # cause VPS have only 1 Public IP so using /32 for subnet mask 255.255.255.255
---
apiVersion: metallb.io/v1beta1
kind: L2Advertisement
metadata:
  name: example
  namespace: metallb-system
spec:
  ipAddressPools:
  - first-pool
Remember to replace
YOUR_VPS_PUBLIC_IP
IPAddressPool: Defines the range of IP addresses that MetalLB can allocateL2Advertisement: Configures Layer 2 mode to announce IPs externallyipAddressPools: Links the L2Advertisement to specific IP pools
Apply configuration
kubectl apply -f metallb-config.yaml
Verify configuration
# for ipaddresspool
kubectl get ipaddresspool -n metallb-system

# for l2advertisement
kubectl get l2advertisement -n metallb-system
Ok, done with the LB, the last thing is the Ingress Controller. Maybe I’ll go with Traefik instead of Nginx Ingress Controller. That’ll be in the next post.
Now, I’m heading back to the bonfire 🔥